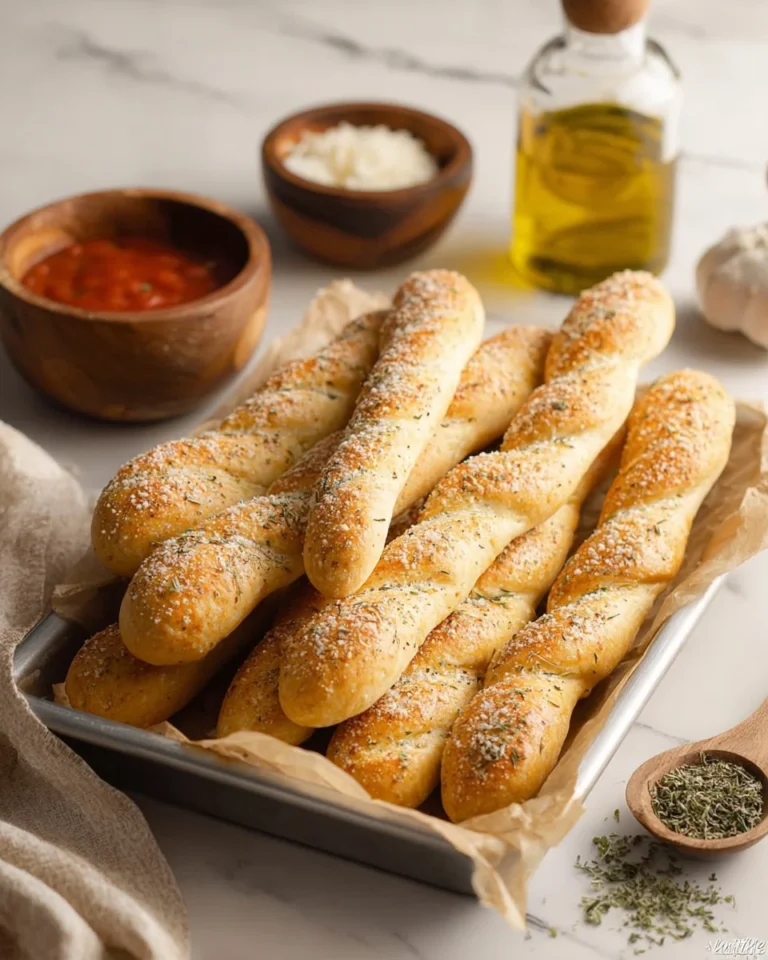
Garlic Butter Bread Rolls

Garlic Butter Bread Rolls are my go to move when dinner feels a little boring and I want something warm and comforting on the table fast. You know that moment when the main dish is ready, but the meal still feels like it needs one more cozy thing? That is exactly where these rolls come in. They are soft, buttery, and they make the whole kitchen smell like garlic toast in the best way. I started making them for family pasta nights, and now everyone kind of expects them. If you have ever wished you could pull restaurant style rolls out of your own oven, this is for you.

Tips for Making Dinner Rolls
Let me save you a batch of frustration with a few simple tips I have learned the messy way. Bread rolls are not hard, but they do like a little patience. When you give them that, they pay you back with that fluffy pull apart texture.
Use warm, not hot, liquid. If you are using yeast, think warm bath water. Too hot can knock it out, and then the dough just sits there looking sad. If you are unsure, dip a clean finger in. Warm and comfy is what you want.
Give the dough time to rise in a cozy spot. I usually turn my oven on for one minute, turn it off, then let the bowl sit inside with the door cracked. Works like a charm, especially in winter.
Do not drown the dough in flour. I know sticky dough feels wrong at first. But a slightly tacky dough usually bakes into a softer roll. Add flour gradually, and stop when it feels smooth and elastic.
Make even sized rolls. This is the difference between some rolls being pale and others being too dark. I eyeball it, but you can use a kitchen scale if you like being precise.
Brush butter twice. Once right after baking so it soaks in, and again for shine and extra flavor. This is where the garlic butter magic really hits.
Ingredient Notes and Substitutions
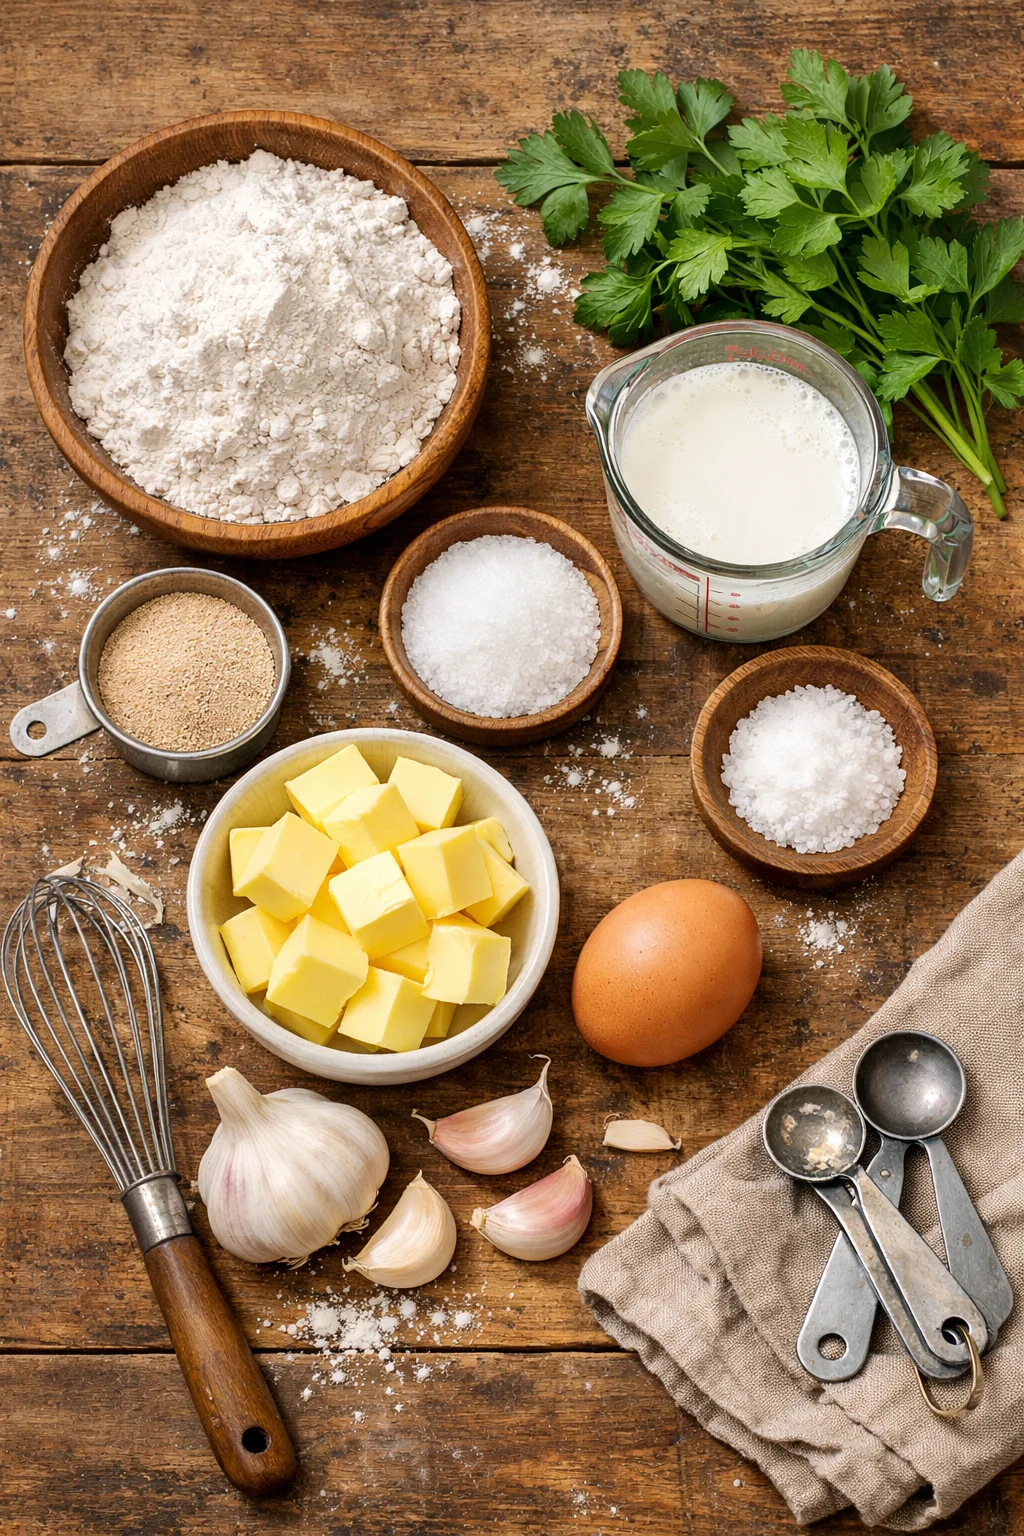
These rolls are made from basic pantry stuff, which is part of why I love them. You do not need fancy flour or anything intimidating. Here is what matters and what you can swap if you need to.
- Flour: All purpose flour works great. Bread flour makes them a bit chewier, which is also nice. If you only have all purpose, do not overthink it.
- Yeast: Instant yeast is easiest because you can mix it straight in. Active dry yeast also works, just wake it up in warm water with a pinch of sugar first.
- Milk or water: Milk gives a softer, richer roll. Water works fine and still tastes great once you add the garlic butter.
- Butter: I use unsalted butter so I can control the salt. If you use salted butter, just reduce added salt a little.
- Garlic: Fresh garlic is best for that real punchy flavor. In a pinch, garlic powder works. If using powder, mix it into the melted butter and let it sit for a minute before brushing.
- Parsley: Totally optional, but it makes the rolls look like you tried extra hard. Dried parsley is fine.
- Cheese add on: A little parmesan in the butter mixture or sprinkled on top is honestly amazing.
One more thing about salt. Do not skip it. Salt keeps the rolls from tasting flat, even with all that butter. I once forgot it and, yeah, never again.
How To Make This Recipe
This is the part where I talk you through it like we are in the kitchen together. The steps are simple, and you do not need a stand mixer, though it helps if you have one. If you are making Garlic Butter Bread Rolls for the first time, I really recommend reading through once before you start, just so nothing surprises you.
What you will need
- Flour
- Yeast
- Sugar
- Salt
- Warm milk or warm water
- Butter
- 1 egg (optional, but makes them richer)
- Fresh garlic or garlic powder
- Parsley (optional)
Step by step directions
1) Mix the dough. In a large bowl, mix warm milk or water with sugar and yeast. If you are using instant yeast, you can skip the waiting. If you are using active dry yeast, give it 5 to 10 minutes until it looks foamy.
Add melted butter (not hot), salt, and the egg if using. Stir in flour little by little until a dough forms. When it starts pulling away from the bowl, you are close.
2) Knead until smooth. Turn it onto a lightly floured counter and knead for about 8 to 10 minutes. You want it smooth and springy. If it sticks a lot, dust a tiny bit more flour, but try not to go heavy.
3) First rise. Put the dough into a greased bowl, cover it, and let it rise until doubled. For me this is usually about 60 to 90 minutes, depending on the room.
4) Shape the rolls. Punch down the dough gently and divide into equal pieces. Roll each into a smooth ball by tucking the edges under. Place them in a greased baking dish with a little space between.
5) Second rise. Cover again and let them puff up until they look pillowy, about 30 to 45 minutes. This rise is what gives you that light texture, so do not rush it.
6) Bake. Bake at 350 F until golden on top, usually 18 to 24 minutes. If your oven runs hot, start checking early.
7) Make the garlic butter topping. While the rolls bake, melt butter and stir in minced garlic, salt, and parsley. Let it sit for a few minutes so the garlic flavors the butter.
8) Brush and serve. As soon as the rolls come out, brush generously with the garlic butter. Wait 5 minutes if you can, then pull one apart and enjoy the steam and that buttery smell.
“I made these for Sunday dinner and my kids ate three each before the pasta even hit the table. The garlic butter on top is everything.”
If you are serving these with soup or pasta, set the dish right in the middle of the table. People love grabbing their own. Garlic Butter Bread Rolls are kind of a social food like that.
;
Why This Recipe WORKS
I am not a professional baker, but I have made enough batches to know what makes a roll recipe reliable. This one works because it keeps the steps simple and leans on a few smart choices.
Two rises give you fluff. The dough gets time to build that soft, airy structure. When you skip the second rise, the rolls usually bake up heavier.
Butter in the dough plus butter on top. The inside stays tender, and the outside gets that glossy, salty finish. The garlic butter also seals in moisture, so the rolls stay soft longer.
Garlic is added after baking. This is a big one. Garlic can burn in a hot oven and turn bitter. Brushing it on at the end keeps the flavor bold but sweet, not sharp.
The recipe is flexible. You can make smaller rolls for a crowd, or bigger ones for sandwich buns. You can even shape them into knots if you want to be fancy without extra effort.
Once you make them a couple times, you will get a feel for the dough. That is when it becomes relaxing instead of stressful.
Overnight Rolls + Make Ahead Tricks
If you are hosting or you just hate last minute cooking chaos, this part is for you. I have done the overnight method so many times for holidays, and it makes dinner feel way easier.
Overnight fridge method
Make the dough and let it rise once at room temp. Shape the rolls, put them in the baking dish, cover tightly, and refrigerate overnight. In the morning, let them sit out for about 60 to 90 minutes until puffy, then bake as usual. Your fridge slows the rise, so the flavor actually gets better.
Freezer option
You can freeze the shaped rolls before the second rise. Put them on a tray to freeze, then move to a freezer bag. When you want them, place in a baking dish, cover, and let thaw and rise at room temp. This takes a few hours, so it is more of a weekend trick, but it is handy.
Make ahead garlic butter tip: Mix the garlic butter and keep it in the fridge for up to 3 days. Bring it to room temp so it spreads easily, or warm it gently. This saves you a few minutes when the oven is already doing its thing.
Common Questions
Why did my rolls turn out dense?
Usually it is because the dough did not rise enough, or too much flour was added. Next time, let the dough get properly puffy and add flour slowly.
Can I make these without an egg?
Yes. The egg makes them a little richer, but they still come out soft without it. Add a splash more milk or water if the dough feels dry.
How do I store leftovers?
Keep them in an airtight container at room temp for 2 days. For longer, freeze them. Rewarm in the oven for a few minutes and brush with a little extra butter if you want them like new.
Can I use garlic powder instead of fresh garlic?
Absolutely. Start with about 1 to 2 teaspoons in the melted butter, taste, and adjust. Let it sit for a minute so the flavor blooms.
What should I serve with Garlic Butter Bread Rolls?
They are perfect with pasta, soup, salads, or even as a side for grilled chicken. Honestly, I have eaten them standing at the counter and called it a snack.
Ready for that warm, buttery bite?
If you want a simple baking win, Garlic Butter Bread Rolls are such a satisfying one. Keep your dough a little soft, let it rise until it is truly puffy, and do not be shy with the garlic butter at the end. The make ahead options are a lifesaver when life gets busy, and the leftovers reheat better than you would expect. If you feel like comparing versions, I also like checking out Garlic Bread Rolls – Cambrea Bakes for more inspiration and little technique tweaks. Now go make a batch and tell me you did not tear one open while it was still steaming.
Print
Garlic Butter Bread Rolls
- Total Time: 39 minutes
- Yield: 12 Rolls 1x
- Diet: Vegetarian
Description
These soft and buttery garlic bread rolls are perfect for any dinner, adding a cozy touch to your meals.
Ingredients
- 4 cups all-purpose flour
- 2 1/4 teaspoons instant yeast
- 1/4 cup sugar
- 1 teaspoon salt
- 1 1/2 cups warm milk or warm water
- 1/2 cup unsalted butter, melted
- 1 egg (optional)
- 4 cloves fresh garlic, minced or 1 to 2 teaspoons garlic powder
- 2 tablespoons fresh parsley, chopped (optional)
Instructions
- Mix the dough. In a large bowl, mix warm milk or water with sugar and yeast. If you are using instant yeast, you can skip the waiting. If using active dry yeast, give it 5 to 10 minutes until it looks foamy. Add melted butter (not hot), salt, and the egg if using, then stir in flour little by little until a dough forms.
- Knead until smooth. Turn it onto a lightly floured counter and knead for about 8 to 10 minutes until smooth and springy.
- Put the dough into a greased bowl, cover it, and let it rise until doubled, usually about 60 to 90 minutes, depending on the room.
- Punch down the dough gently and divide into equal pieces. Roll each into a smooth ball by tucking the edges under and place them in a greased baking dish.
- Cover again and let them puff up until they look pillowy, about 30 to 45 minutes.
- Bake at 350°F (175°C) until golden on top, usually 18 to 24 minutes.
- While the rolls bake, melt butter and stir in minced garlic, salt, and parsley.
- Brush generously with the garlic butter as soon as the rolls come out and let them sit for a few minutes before serving.
Notes
For a richer flavor, the egg is optional. You can also use garlic powder in place of fresh garlic. Try adding a little Parmesan for extra flavor.
- Prep Time: 15 minutes
- Cook Time: 24 minutes
- Category: Side Dish
- Method: Baking
- Cuisine: Italian
Nutrition
- Serving Size: 1 roll
- Calories: 200
- Sugar: 2g
- Sodium: 300mg
- Fat: 9g
- Saturated Fat: 5g
- Unsaturated Fat: 3g
- Trans Fat: 0g
- Carbohydrates: 26g
- Fiber: 1g
- Protein: 4g
- Cholesterol: 20mg
Keywords: bread rolls, garlic rolls, dinner rolls, homemade bread, baking