Easy Chewy Granola Bars You Can Make at Home
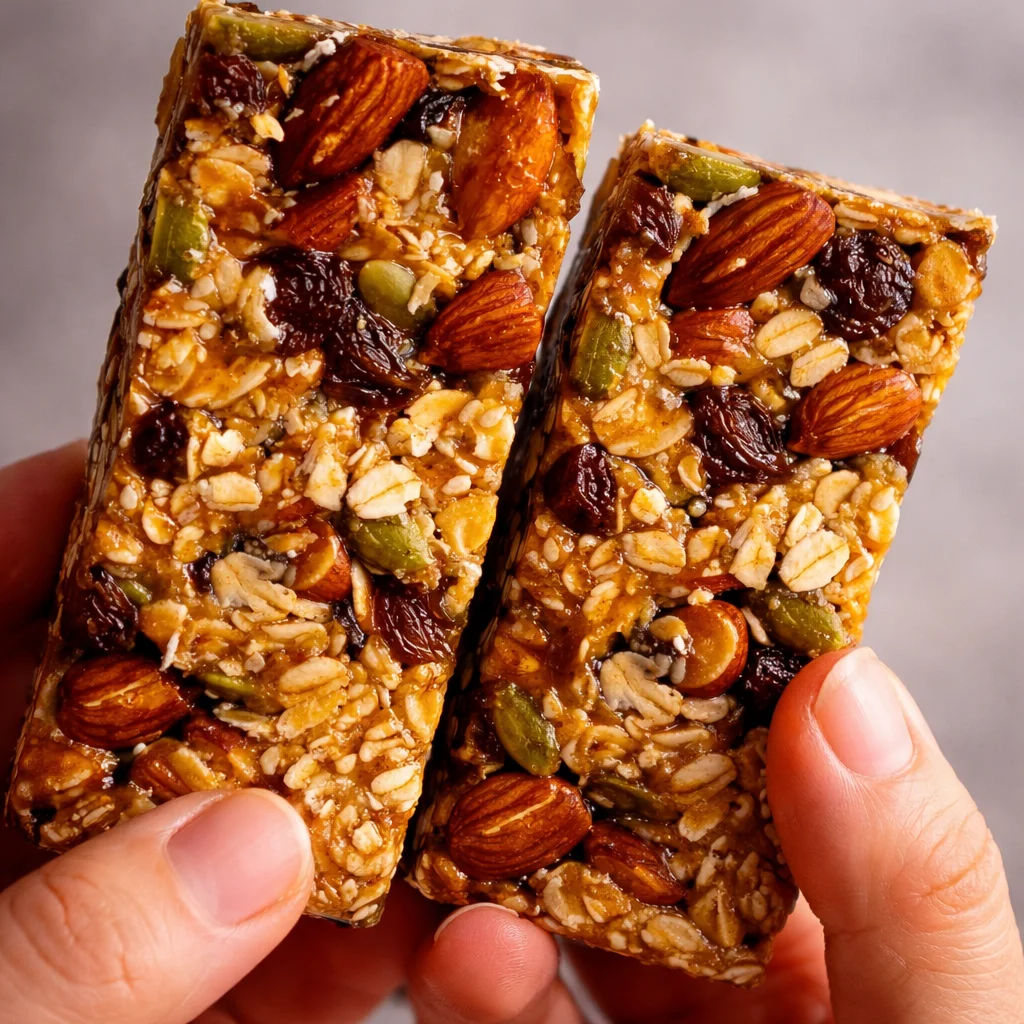
Easy Chewy Granola Bars are my little lifesaver on the days when breakfast somehow turns into a sad granola-in-the-bottom-of-my-bag situation. If you have ever bought a box of bars and thought, why are these either rock hard or weirdly sticky, you are not alone. Making them at home is honestly simpler than it sounds, and you get to control the sweetness and the add ins. Plus your kitchen will smell like toasted oats and honey for a while, which is not a bad thing. I make a batch, stash them for the week, and suddenly I feel like I have my life together.

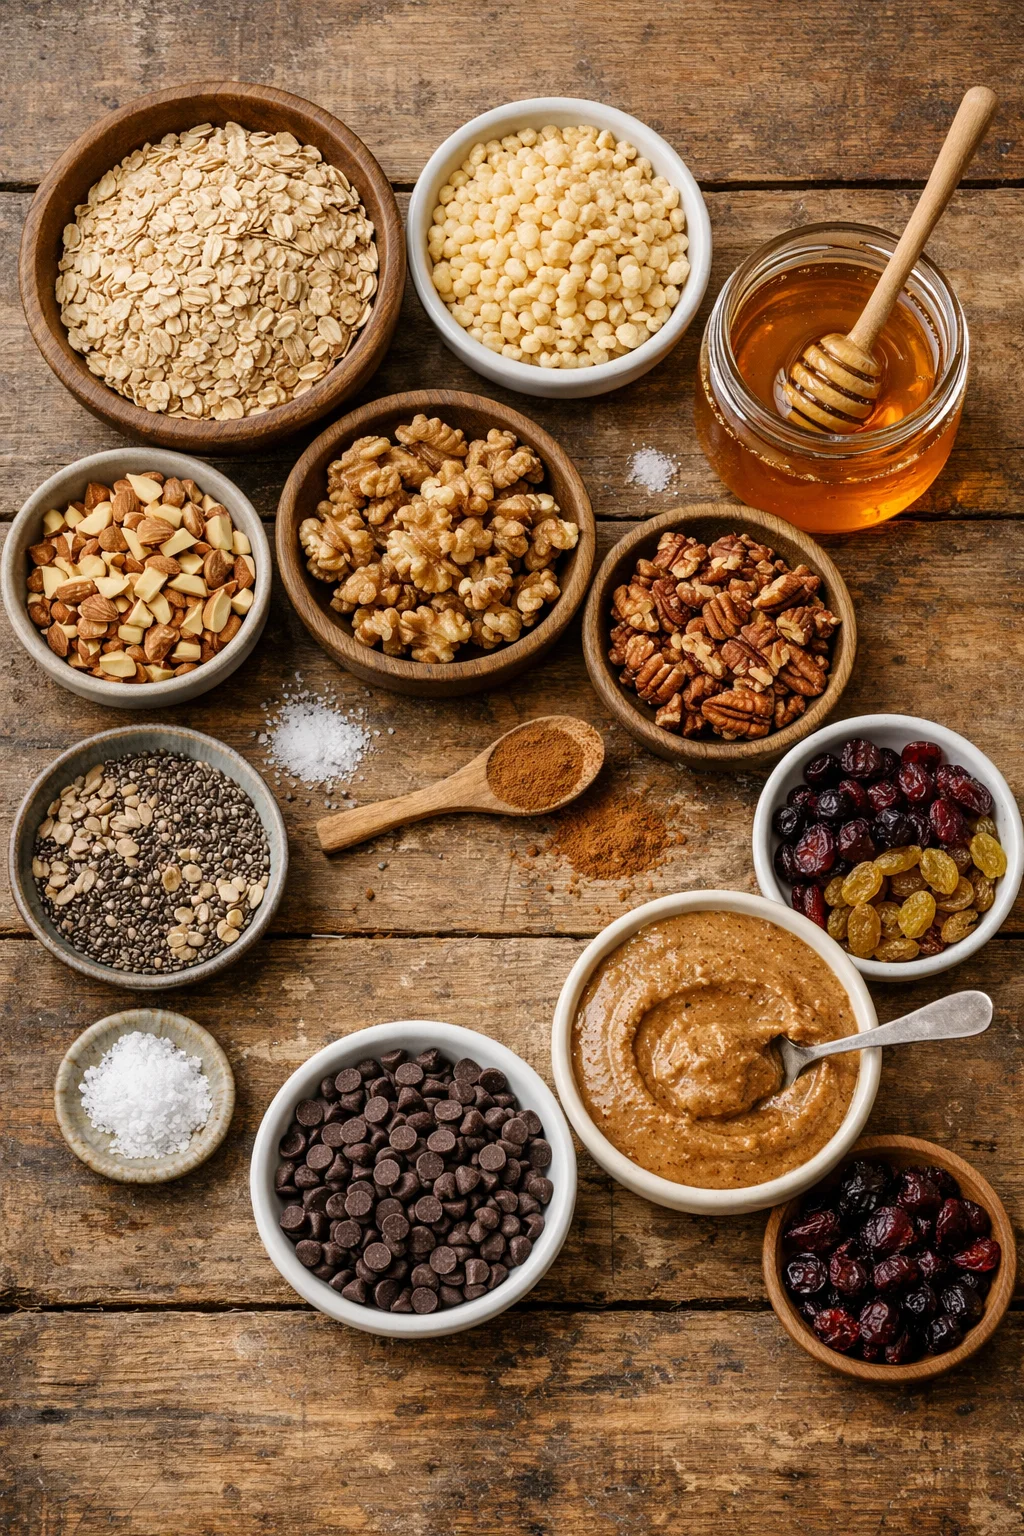
Granola Bar Recipe Ingredients
The best part about this recipe is that it uses basic pantry stuff. You do not need fancy protein powders or specialty syrups. You just need the right balance of dry ingredients for texture and a good sticky binder so the bars hold together and stay chewy.
Here is what I use for my go to batch, which makes about 10 to 12 bars depending on how you cut them:
- Old fashioned rolled oats: the main base, gives that classic granola bar bite
- Crispy rice cereal (optional but awesome): makes them lighter and less dense
- Chopped nuts (almonds, walnuts, pecans): adds crunch and keeps you full
- Seeds (chia, flax, sunflower): totally optional, but nice for texture
- Salt: a tiny bit makes the sweetness taste better
- Cinnamon or vanilla: for cozy flavor
- Honey or maple syrup: this is the sticky binder that helps everything cling together
- Peanut butter or almond butter: another binder and it brings that chewy richness
- Mini chocolate chips or dried fruit: add these after cooling a bit so they do not melt into a mess
If you are making these for lunchboxes, I lean into simple flavors like peanut butter, a little vanilla, and mini chocolate chips. If I want something a bit more snacky, I add toasted coconut and chopped almonds. Also, if you are meal planning, these pair really well with easy dinners like easy grilled chicken wraps because you can prep everything ahead and grab and go all week.
How to Make Granola Bars
This is a stir, press, and chill situation. You can bake them lightly if you want a toastier vibe, but my favorite version is no bake because it stays extra chewy and never dries out.
Step by step (my no stress method)
1) Prep your pan. Line an 8×8 or 9×9 pan with parchment paper. Leave a little overhang so you can lift the whole thing out later. This matters more than you think.
2) Toast the oats (optional but worth it). Spread oats and nuts on a sheet pan and bake at 350 F for about 8 to 10 minutes. Keep an eye on them. They go from golden to too dark fast.
3) Warm the binder. In a small pot, gently warm honey (or maple syrup) with nut butter and a pinch of salt. You are not trying to boil it. Just warm until it is smooth and pourable.
4) Mix it up. Pour the warm mixture over your oats and stir until everything looks coated. If you are adding chocolate chips, let the mixture cool for a few minutes first so you do not end up with chocolate streaks everywhere.
5) Press hard. Dump the mixture into the pan and press it down firmly. I use the bottom of a measuring cup and really lean into it. This is the secret to bars that do not crumble.
6) Chill, then slice. Refrigerate for at least 1 to 2 hours. Then lift out, cut into bars, and try not to eat the edge pieces immediately. I fail at this every time.
One quick note: if you want to lightly bake them instead, bake at 325 F for about 12 to 15 minutes, cool completely, then slice. Baked bars hold up a little better in warm weather, but they are slightly less chewy.
Granola Bar Recipe Tips
These tips are the difference between “wow, I made these” and “why are these falling apart in my hand.” I have made every mistake so you do not have to.
Pressing is everything. I know I already said it, but it is the truth. If you press lightly, you get granola crumbles. If you press firmly, you get bars.
Get the ratio right. If the mix looks dry before pressing, add 1 to 2 more tablespoons of honey or nut butter. If it looks wet and slick, add a handful of oats.
Salt is not optional. Even a small pinch makes the flavors pop. Especially if you are using chocolate or peanut butter.
Cool before slicing. Warm bars seem set, but then they fall apart. Chill them fully and use a sharp knife.
Keep add ins realistic. It is tempting to throw in everything. But too many chunky add ins can make bars hard to slice and harder to hold together.
“I made these on Sunday and my kids ate them all by Tuesday. They stayed chewy all week and did not crumble in the lunchbox. This recipe is a keeper.”
Also, if you are the kind of person who likes to batch cook (same), these bars are perfect alongside comfort meals you can set and forget, like easy crockpot cheesy chicken broccoli rice. Future you will be so happy.
Homemade Granola Bars Variations
Once you make Easy Chewy Granola Bars a couple times, you will start customizing without even thinking about it. Here are a few of my favorite combos that actually taste good and still hold together.
Flavor ideas you can mix and match
Chocolate peanut butter: peanut butter base, mini chocolate chips, and a sprinkle of flaky salt on top.
Cranberry almond: dried cranberries, sliced almonds, and a tiny pinch of cinnamon.
Trail mix style: raisins, chocolate chips, sunflower seeds, and chopped cashews.
Coconut cashew: toasted coconut, chopped cashews, and vanilla.
Pumpkin spice: add cinnamon, nutmeg, and a few tablespoons of pumpkin puree, but reduce the honey a bit so it does not get too soft.
If you need them nut free, sunflower seed butter works well. Just know it has its own flavor, kind of earthy, but still good. If you need them vegan, use maple syrup and a plant based butter style spread or seed butter.
And if you are aiming for a bit more protein, stir in hemp hearts or use a higher protein nut butter. I do not love adding protein powder because it can make the bars chalky, but if you do, start with one tablespoon and see how it feels.
Storing Homemade Granola Bars
Easy Chewy Granola Bars are great because they store like a dream. The main thing is keeping them from drying out, and keeping them cool if your kitchen runs warm.
My simple storage routine
Fridge: Store in an airtight container for up to 7 to 10 days. I separate layers with parchment so they do not stick.
Freezer: Wrap bars individually and freeze for up to 2 months. Let one sit at room temp for 15 to 20 minutes and it is ready.
Room temperature: If your house is cool, they can sit out for a few days, but in summer they get softer. In that case, keep them in the fridge so they stay firm enough to hold.
One more thing. If you slice them and they seem a little crumbly, pop them back in the fridge for 30 minutes. They often firm up once the binder fully sets. And if they are too hard straight from the fridge, let them sit for 5 minutes before eating for the best chew.
Common Questions
Why are my granola bars falling apart?
Usually it is not enough binder or you did not press the mixture firmly enough. Add a little extra honey or nut butter next time, and really pack it into the pan.
Can I make these without peanut butter?
Yes. Almond butter, cashew butter, or sunflower seed butter all work. If you use a runny nut butter, you may need a few extra oats.
Do I have to bake them?
Nope. The no bake version is the chewiest. Baking gives a slightly toastier flavor and a firmer bite.
How do I keep chocolate chips from melting?
Let the oat mixture cool for about 5 to 10 minutes before stirring them in. If the bowl feels hot, wait a bit longer.
Can I reduce the sweetener?
You can reduce it slightly, but not too much or the bars will not hold. Try cutting the honey by 2 tablespoons and replacing with 1 tablespoon extra nut butter.
A little pep talk to go make a batch
If you have been buying snack bars and feeling disappointed, making Easy Chewy Granola Bars at home is such a satisfying switch. You only need a few ingredients, one pan, and a little chill time, and you end up with a snack that actually tastes like something you want to eat. For even more inspiration, I have also enjoyed the ideas in Homemade Granola Bars Recipe – Love and Lemons, especially when I want to mix up flavors. Give this recipe a try this week, tweak it to your taste, and stash a few in the freezer for the next busy morning. I promise, future you is going to be very grateful.
Print
Easy Chewy Granola Bars
- Total Time: 30 minutes
- Yield: 10-12 bars 1x
- Diet: Vegetarian
Description
Delicious homemade granola bars that are chewy, easy to make, and customizable with various flavors.
Ingredients
- 2 cups old fashioned rolled oats
- 1 cup crispy rice cereal (optional)
- 1 cup chopped nuts (almonds, walnuts, pecans)
- 1/4 cup seeds (chia, flax, sunflower – optional)
- 1/2 teaspoon salt
- 1 teaspoon cinnamon or vanilla extract
- 1/2 cup honey or maple syrup
- 1/2 cup peanut butter or almond butter
- 1/2 cup mini chocolate chips or dried fruit
Instructions
- Prep your pan by lining an 8×8 or 9×9 pan with parchment paper.
- Toast the oats and nuts on a sheet pan at 350°F for about 8-10 minutes.
- In a small pot, warm honey or maple syrup with nut butter and a pinch of salt until smooth.
- Pour the warm mixture over the oats and stir until coated. Let cool slightly if adding chocolate chips.
- Press the mixture firmly into the pan using the bottom of a measuring cup.
- Chill for at least 1-2 hours, then lift out and slice into bars.
Notes
For a toastier flavor, you can lightly bake the bars at 325°F for 12-15 minutes. Store in an airtight container in the fridge for up to 7-10 days or freeze for up to 2 months.
- Prep Time: 15 minutes
- Cook Time: 15 minutes
- Category: Snack
- Method: No Bake or Baking
- Cuisine: American
Nutrition
- Serving Size: 1 bar
- Calories: 180
- Sugar: 10g
- Sodium: 100mg
- Fat: 8g
- Saturated Fat: 1.5g
- Unsaturated Fat: 6g
- Trans Fat: 0g
- Carbohydrates: 25g
- Fiber: 2g
- Protein: 4g
- Cholesterol: 0mg
Keywords: granola bars, healthy snacks, homemade snacks, meal prep, no bake