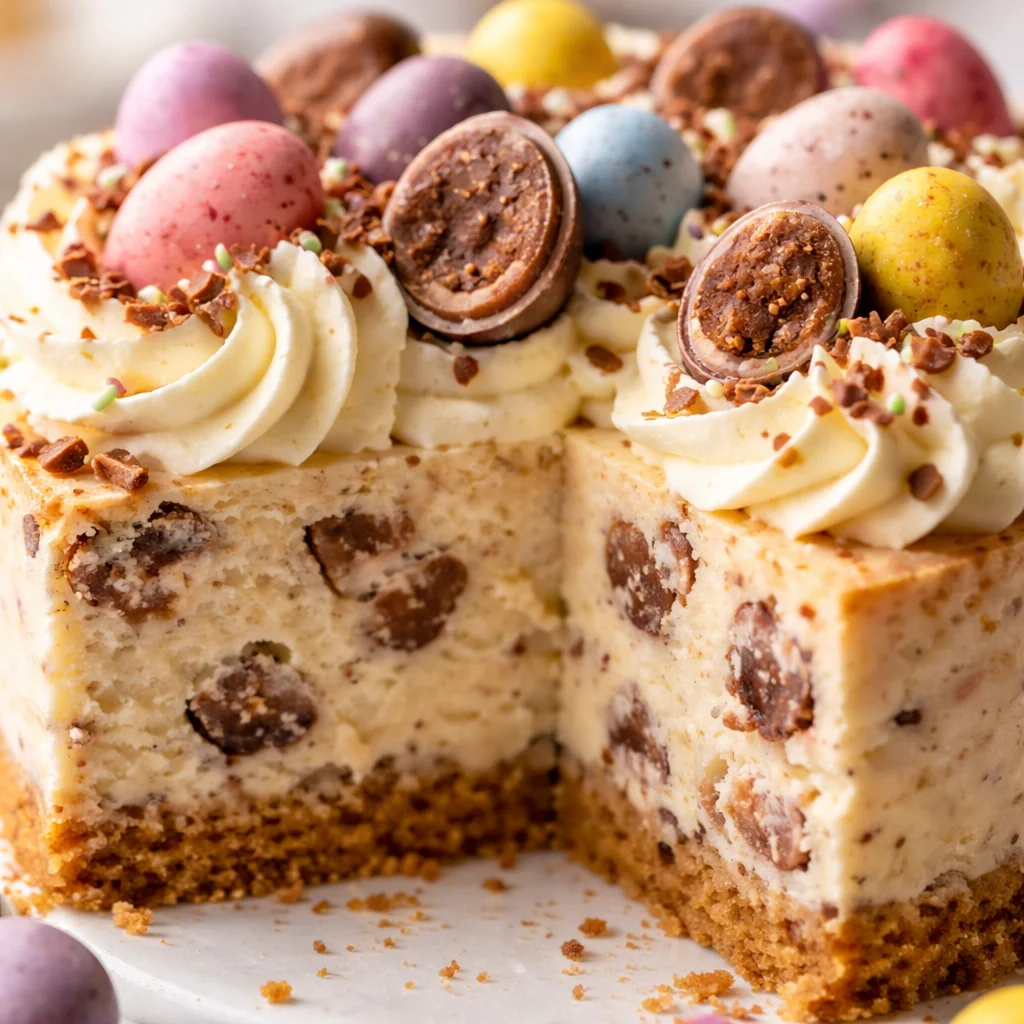
Easter Egg Cheesecake
Easter Egg Cheesecake is the kind of dessert I make when I want something that looks festive but doesn’t require fancy decorating skills. Maybe you’ve been invited to an Easter lunch and you’re stuck thinking, “What can I bring that won’t melt in the car and still feels special?” Or maybe you just want a treat that makes your fridge feel a little more cheerful every time you open it. This recipe is my go to because it’s creamy, crunchy, and packed with those little chocolate egg surprises. And honestly, it’s a fun one to make with kids or a friend because there’s a lot of harmless snacking along the way.

How to make an Easter Egg Cheesecake
I’m going to walk you through this the same way I do it at home, in plain language, with the little details that actually help. This is a no stress cheesecake as long as you give it enough chill time. If you try to rush it, it will taste good, but it won’t slice as neatly, and you’ll be slightly annoyed at yourself. Ask me how I know.
What you will need
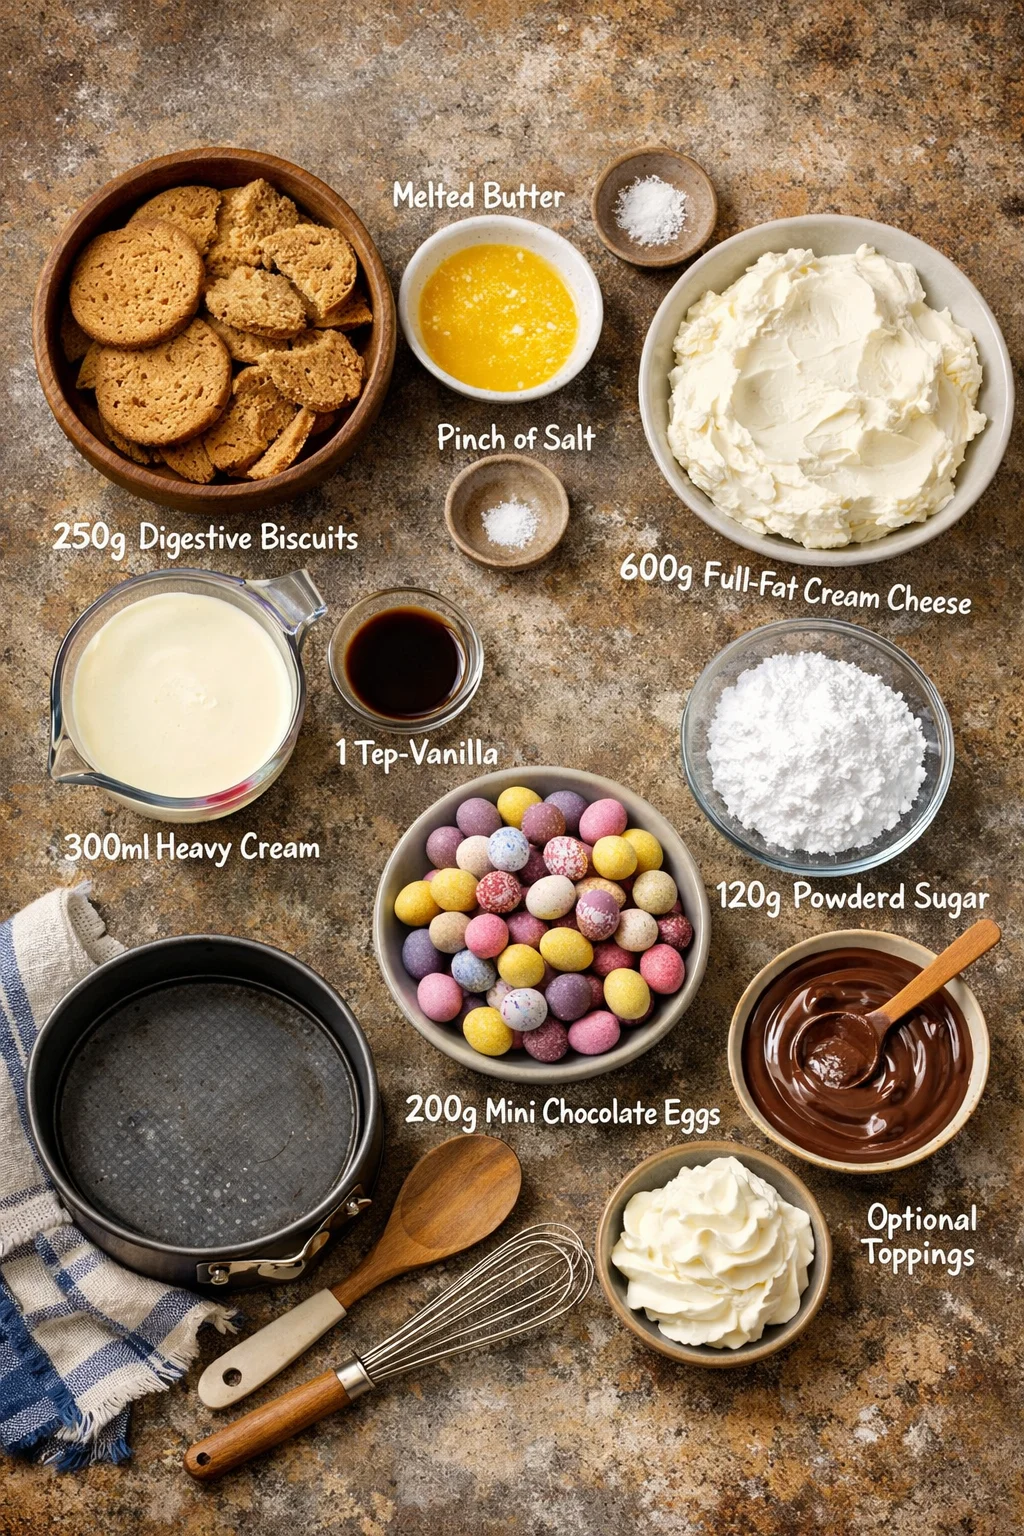
- Crust: 250g digestive biscuits (or graham crackers), 100g melted butter, pinch of salt
- Filling: 600g cream cheese (full fat works best), 120g powdered sugar, 1 tsp vanilla, 300ml heavy cream
- Mix ins: about 200g mini chocolate eggs (plus extra for topping)
- Optional toppings: melted chocolate, whipped cream, extra crushed biscuits
I use a springform pan, around 8 inches. If you only have a regular cake tin, you can still do it, but you’ll want to line it really well so you can lift it out. No one wants to dig cheesecake out with a spoon while pretending that was the plan.
Step by step directions
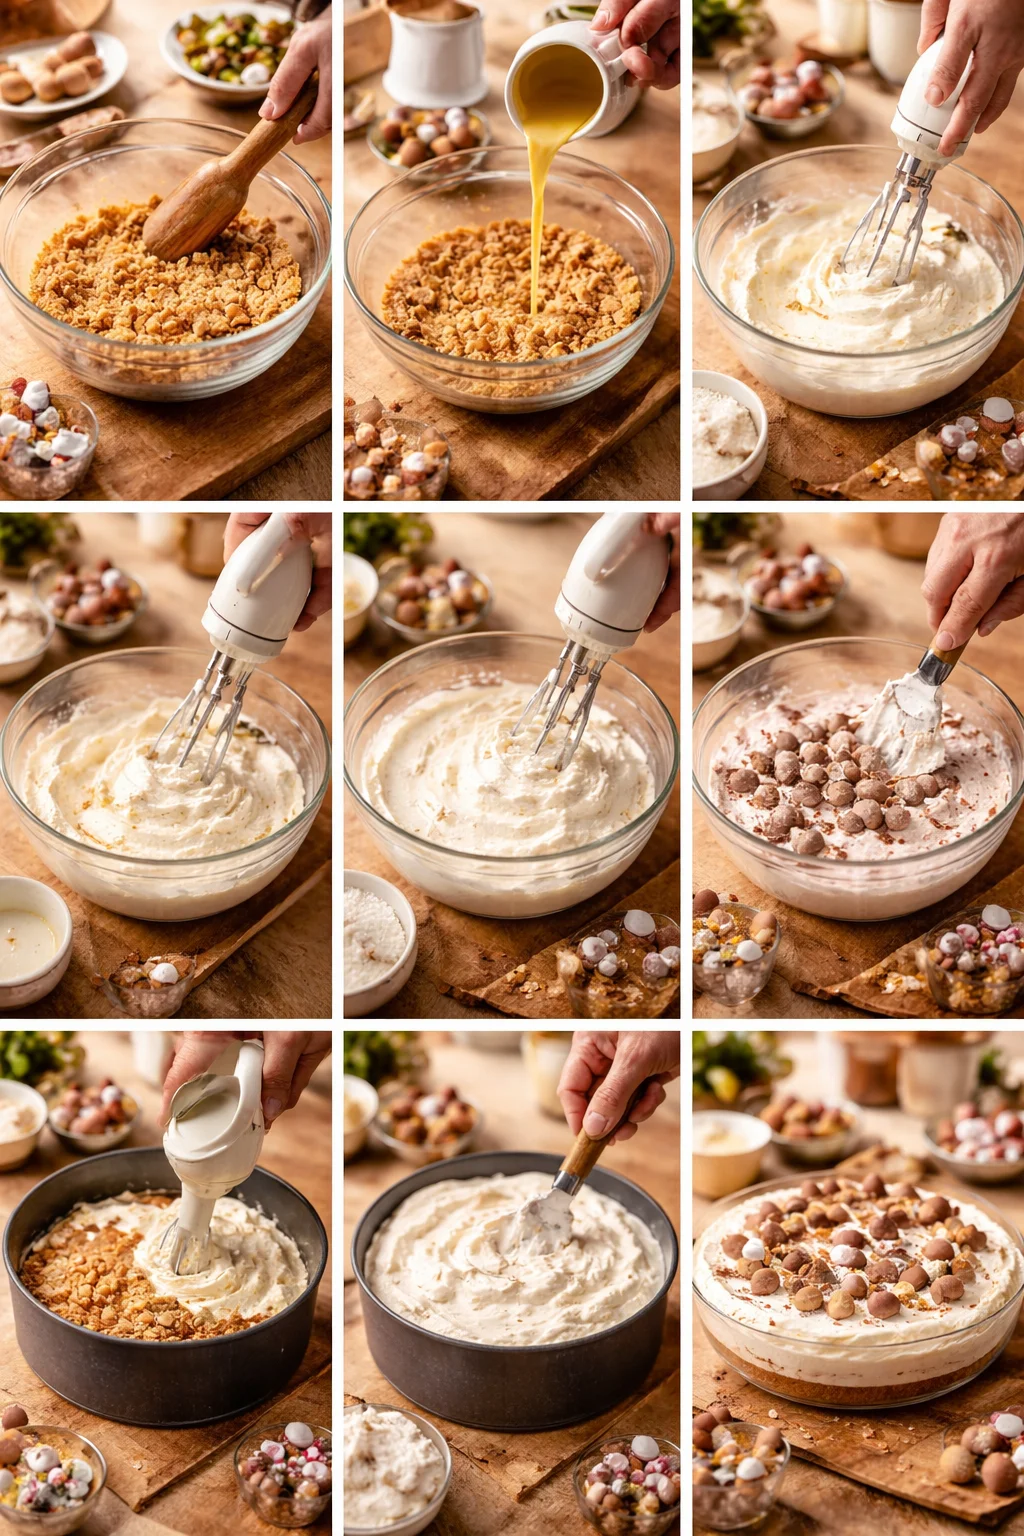
1) Make the crust. Crush your biscuits until they look like sandy crumbs. Stir in the melted butter and a pinch of salt. Press it into the bottom of your pan and really pack it down. I use the bottom of a glass. Pop it in the fridge while you make the filling.
2) Whip the cream. In a bowl, whip the heavy cream until it holds soft peaks. You want it fluffy but not stiff and grainy. If it looks like it could turn into butter any second, you went a bit far.
3) Mix the cream cheese base. In a bigger bowl, stir the cream cheese, powdered sugar, and vanilla until smooth. Don’t overmix like crazy, just get it creamy and lump free.
4) Combine gently. Fold the whipped cream into the cream cheese mixture. Do it gently so you keep the airy texture. This is what makes it feel light instead of heavy.
5) Add the eggs. Roughly chop the mini eggs. I like a mix of chunks and smaller bits so every bite has something going on. Stir them through the filling.
6) Chill. Spoon the filling onto the crust and smooth the top. Cover it and refrigerate for at least 6 hours, but overnight is even better.
7) Decorate. Right before serving, top with extra mini eggs, a drizzle of melted chocolate, or little swirls of whipped cream. This is where it starts looking like a proper Easter Egg Cheesecake, the kind people take photos of before they grab a slice.
Tips for a perfect cheesecake
I’ve made enough cheesecakes to know the small things matter more than complicated techniques. If you want that smooth slice that holds together and still looks creamy, here’s what I’d tell you if you were standing in my kitchen.
- Use room temperature cream cheese. Cold cream cheese loves to stay lumpy.
- Don’t rush the chill. This is the biggest reason people end up with messy slices.
- Pack the crust firmly. If it’s loose, it crumbles when you cut it.
- Chop the chocolate eggs, don’t leave them whole. Whole mini eggs can make slicing frustrating.
- Line the pan. A circle of parchment on the bottom is a lifesaver for serving.
One more thing that sounds boring but helps a lot: taste your filling before you add the eggs. Some brands of cream cheese are tangier than others, and you might want a bit more sugar or vanilla. This is your dessert, you’re allowed to adjust it.
“I made this for our family Easter dinner and it disappeared so fast I barely got a second slice. The mini eggs inside were the best part. Even my dad asked for the recipe.”
Ingredient highlights
Let’s talk about what makes this one work, because an Easter dessert can be cute, but it also has to taste good. This is where the magic comes from.
Cream cheese: Full fat gives you the best texture and a richer taste. Light cream cheese can work, but it often ends up softer, and sometimes a bit watery. If you do use it, just know you might need extra chill time.
Heavy cream: This is what makes a no bake cheesecake set up without baking. When you whip it first and then fold it in, you get that fluffy, creamy filling that still slices clean.
Mini chocolate eggs: They do two jobs. They add crunch and they add that nostalgic Easter candy flavor. I like using a mix of milk chocolate and some that have a candy shell for extra texture.
Digestive biscuits or graham crackers: This is your simple, buttery base. If you want to switch it up, chocolate cookies are also great, especially if you want a more chocolatey vibe.
And here’s a practical note: if your mini eggs are super hard right out of the bag, don’t worry. Once they sit in the filling overnight, they soften slightly and become easier to slice through, but they still keep a little crunch.
How to store your cheesecake
This is one of my favorite things about making this dessert. You can prep it ahead and it actually gets better after a night in the fridge. That’s a rare win.
In the fridge: Cover the cheesecake tightly or keep it in a cake container. It stays great for about 3 to 4 days. The crust may soften a little over time, but it still tastes really good.
In the freezer: You can freeze it, but I recommend freezing it without the final toppings. Wrap slices individually so you can grab one whenever the craving hits. Thaw in the fridge overnight for the best texture.
One more tip: Keep it away from strong smelling foods in the fridge. Cheesecake can pick up smells faster than you’d think, and nobody wants a garlic scented dessert.
How to know when cheesecake is done
Since this is a no bake style, “done” really means “set.” You’re looking for a texture that’s firm enough to slice, but still creamy when you bite into it.
Here’s how I check it:
The jiggle test: Gently shake the pan. The center should wobble slightly, not slosh. If it looks like pudding, it needs more time.
The touch test: Lightly tap the center with a clean finger. It should feel cool and set, not sticky.
The slice test: If you’re nervous, cut a small sliver at the edge. If it holds a clean line, you’re good. If it collapses back into itself, cover and chill longer.
If you’re making Easter Egg Cheesecake for a party, I really suggest chilling overnight. It takes the stress out of timing, and it slices like a dream the next day.
Common Questions
Can I make Easter Egg Cheesecake the day before?
Yes, and you should if you can. Overnight chill time makes it set better and taste more balanced.
What if I don’t have a springform pan?
Use a deep dish pie plate or line a regular tin with parchment so you can lift it out. It might not look as tall, but it will still be delicious.
Why is my filling runny?
Most often it’s because the cream wasn’t whipped enough, or the cheesecake just needs more chill time. Also check that you used heavy cream, not half and half.
Do the mini eggs get too hard to cut?
Chop them first and you’ll be fine. After chilling, they soften slightly in the filling, which helps a lot.
Can I swap mini eggs for other candy?
Totally. Chopped chocolate bars, peanut butter eggs, or even crushed cookies work well. Just keep the pieces small so slicing stays easy.
A sweet final note before you bake, chill, and sneak a spoonful
This Easter Egg Cheesecake is creamy, crunchy, and honestly just plain fun to serve, especially when you pile those extra chocolate eggs on top. Give yourself time for chilling, use room temperature cream cheese, and don’t be shy about tasting as you go. If you want another take on the idea, I also like peeking at Easter Egg Cheesecake – Amy Treasure for extra inspiration when I’m in a decorating mood. I hope you make it, share it, and keep a slice tucked in the fridge for a quiet treat later.
Print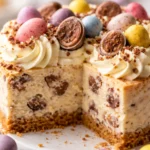
Easter Egg Cheesecake
- Total Time: 360 minutes
- Yield: 8 servings 1x
- Diet: Vegetarian
Description
A creamy, crunchy cheesecake filled with mini chocolate eggs, perfect for festive gatherings.
Ingredients
- 250g digestive biscuits (or graham crackers)
- 100g melted butter
- Pinch of salt
- 600g cream cheese (full fat preferred)
- 120g powdered sugar
- 1 tsp vanilla extract
- 300ml heavy cream
- 200g mini chocolate eggs (plus extra for topping)
- Optional: melted chocolate, whipped cream, extra crushed biscuits
Instructions
- Make the crust by crushing the biscuits until sandy, then stir in melted butter and salt. Press into the bottom of a springform pan and refrigerate.
- Whip the heavy cream until it holds soft peaks.
- Mix the cream cheese, powdered sugar, and vanilla until smooth and lump-free.
- Combine gently by folding the whipped cream into the cream cheese mixture.
- Add roughly chopped mini chocolate eggs to the filling.
- Chill the mixture on the crust for at least 6 hours, preferably overnight.
- Decorate before serving with extra mini eggs, melted chocolate, or whipped cream.
Notes
Be sure to use room temperature cream cheese and pack the crust firmly for the best texture. Taste the filling before adding eggs to adjust sweetness if necessary.
- Prep Time: 30 minutes
- Cook Time: 0 minutes
- Category: Dessert
- Method: No-Bake
- Cuisine: American
Nutrition
- Serving Size: 1 slice
- Calories: 350
- Sugar: 25g
- Sodium: 300mg
- Fat: 22g
- Saturated Fat: 12g
- Unsaturated Fat: 8g
- Trans Fat: 0g
- Carbohydrates: 30g
- Fiber: 1g
- Protein: 5g
- Cholesterol: 70mg
Keywords: Easter, cheesecake, dessert, no-bake, festive